I will however share the progress made in this morning's nap time, which was short as E decided one hour was enough. :( So today, I bring you the woodworking portion of the swing project!
Supplies Needed:
- Two 3' lengths of 1" Hardwood Dowels (I used Oak)
- A drill w/ a larger than 5/16" bit (I went up two sizes and still had to work to get the rope through)
- Miter Saw or Handsaw
- Measuring Device
- Shellac or Finish of your choice (Optional)
SAFETY FIRST: when in the shop, use appropriate protection. Follow all safety guidelines given with your equipment. And remember: there is no more important safety equipment than these (points to eye) safety glasses. (Thank you, Norm Abram & New Yankee Workshop)
Ok, safety check complete? Let's get cracking! Measure 16" lengths on your dowels and cut two at this length. This cut can be done with a miter saw or handsaw. Putting painters tape around the dowel will help prevent splinters if you are using a miter saw.
Measure 15 1/4" on your dowels & cut two. Again, use the painters tape to reduce splinters.
Gather the rest of your supplies. I used a drill and a doweling jig. The jig is handy but not required. You could also use a drill press ...or go to free style with just the drill and a prayer.
Measure 1" from the ends of your dowels. Place a mark.
Using your doweling jig will help you keep the dowel from rolling around. It will also allow you to drill in the center of the dowel which is important for safety reasons. You don't want these holes too close to an edge.
When drilling your holes, use a sacrificial board under your dowels to reduce splinters and protect your (or your husband's in my case) workbench.
Loosen the jig just enough to slide the dowel through until your other end's mark is lined up with your drill hole. Be sure to keep the hole you already drilled upright. You want your holes to be as close to parallel as possible.
Repeat this step with all four of your dowels until they are all lined up like nice soldiers on the bench. Yay!
Now you'll notice the edges are a little harsh. You have options here. If you have an oscillating sander, use it to round over the edges. Be careful of your fingers though. Sanders give particularly nasty manicures. Thus my little injury today. I noticed that my pinky was getting in the habit of sticking out like a Brit enjoying High Tea, and I reminded myself to tuck it in like the Yank that I am. Then I forgot. And the sander reminded me. It's not a serious injury, just a raw finger tip, but it doesn't feel great. I think I'll use it to get out of dish duty for a few days :-p
A better option would have been to use good ole' sandpaper and sweat equity. The edges don't have to be perfectly oval... just rounded over would be fine. I found rolling the end of the dowel into my palm produced the most even round over for me. You can experiment with what works for you.
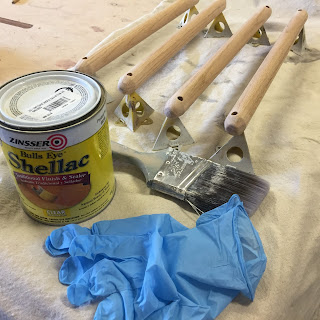
Once you are happy with the ends of your dowels, you can place a finish on if desired. I choose Shellac. Mostly because I had some leftover from previous projects. It is fast drying and once dry it is considered a food safe finish. Given children's need to put anything in their mouth, this was important to me. I didn't use any other stains or dyes on this one, though you could easily use a tea or coffee dye if you wanted to keep it food safe.
Though shellac usually dries in 15 minutes, it takes substantially longer if you dip the ends in the shellac entirely. I got frustrated trying to get the insides of the drilled holes covered in shellac and so... yeah, in the tub they went. I'm at 6 hours and they are just starting to feel dry. I'll let them continue to sit until tomorrow. Hopefully by then my pinky will feel better too. Boo hoo, poor me.
We're getting closer! Soon, I should be able to complete the assembly and get it hung up! Exciting times are in our future! Stay with me!


No comments:
Post a Comment